BGP #6

Welcome back to Causality!

Today I will talk about what I accompliced at week 6! During week 6 I had to implement  new features to our game, and here I will explain why and how. The reason we decided to add new features was because we had been talking to one of our teachers and realized that we wouln’t be able to have several weapons and that it would require to much work from the graphical artists. So we decided to add a special move and a way to increase damage. 

Fristly we added an enhancment skill to increase damage, the enhancment would be a fire enchant on your weapon which would deal double the damage and even deal give the enemies a debuff to lose health overtime. The debuff idea got scrapped for time issuses, however we were able to add extra damage to it while active.

Secondly we wanted to have a special skill for the players to use, after some choices we discussed to add a spin attack we named whirlwind. This attack would last for a few seconds and deal fast damage while it was active. This reason we added this skill is because we lacked a little variety in our attacks.

I started working on the abilities by making a system handler. To begin with I decided to make a single script for both of the abilities since that was the simplest solution. In the update of this script I checked if any of our buttons were pressed and if they were I would have a function for that ability to activate.

I had a function handle the active variables like rotate the player if he was doing the whirlwind and I set their animation bool to true so unitys animator manager could change to the right animation aswell as reducing the stamina variable that the player relied on if the ability was active. 

Now all that was left was to end them which was different for attacks and abilities because attacks checked if their animation was over while the abilities such as whirlwind or firesword had a timer.
BGP #5

Welcome back to Causality!

Today I will talk about what I have accomplised during week 5 of the production of Causalityly. During week 5 I implemented a life stealing ability for the player, how and why I implemented life steal I will tell you now. Causality needed a unique game feature so after brain storming we came up with the idea that you would be able to enter another dimension. In the other dimension you had would have the ability to absorb life from your enemies after dealing damage to them.

Your attacks would injure the enemies and then the player would draw the blood by pulling it through the air and then absorb it into himself using a magical force which would then give the player more health back. The reason we implemented a where you should absorb the opponents blood to increase health is because we didn’t want the player to have undeserved help with health potions that you drank with the press of a button instead we wanted a more skill based healing system to challenge our player base.

What needed to be done to implement this skill was to have a splatter blood when hitting the enemy. What I had to do to make that happend was create a particle system and that replicated a blood stain to look like blood splatter. I began by using a unity coding function that Instantiate a prefab object from the resourses map however the blood always looked wierd.

So instead I spawn the particle system at the chest area of the monster and then expand in all directions using the particle systems emission function in a sphere shape then I added a script to the particle system to check if every particle had lived for x seconds then they would have to change their direction and fly towards the player.

When the distance of the particles and the player was the same I changed the particle lifetime to 0 which destroys the particle using the particles own system.

BGP #4

Welcome back to Causality!

Today I will talk about what has been accomplised during week 4! I will talk about why and how I implemented a special evasive maneuver for our game Causality. The reason we wanted an evasive maneuver was to increase the players mobility but also to help the player evade attacks and move away from enemies. So this evasive maneuver had to be something that could be used fast and move the player away if necessary from combat so we decided to use a roll for this purpuse. One thing the roll needed was invincibility frames so the attacks wouldn’t damage him in case he get hit because the player lost all control because the roll was fixed.

So use invincibility frames I had to use a bool check when the player got hit and to activate or deactivate the bool I used an event when the animation had reach a point so it wouldn’t be instant turned on be to fast and turned it off before the character got out of the animation to prevent it from becoming to overpowered by making the player invincible. The event that activated and deactivated was added in the animation manager.

Then I used unitys input manager to send a button press and then check in a function if you had pressed the right button. Pressing the right button activated the roll, where I had to take the input of the joysticks and change the rotation of the character to the direction that we joystick was pointing towards. Then I had calculate where the player would end up so you couldn’t change during the roll by setting the target position to a distance ahead of the player using unitys vector3 forward function and also activate a bool to prevent the player from restarting the roll during its travel.

Then I coded a function where it would update the position of the player while the roll was active overtime and time it with the roll animation. The roll was active until the player had reached its target position where I ended the roll movement and timed the animation by increasing the speed of the animation so it would feel connected with the distance it had to traveled.

BGP #3

Welcome back to Causality!

Today I will talk about what have happend during week 3 while working on Causality so this time I will focus on how I got our camera to look at the enemies from behind the player using my own function the lock on. . When working on the lock on function for the camera I cooperated with my lead programmer.

We wanted to be able to lock the camera behind the player so the player could face the boss and so you could see the boss properly during the fight if you wished. So we began by implementing an old script coded from a tutorial which was used to follow behind the player made by another programmer in our team however as the camera needed to be behind the player and still facing the boss boss.

So to begin with we used a unity function called LookAt. LookAt set the facing direction towards the object sent in through a paramenter in the function, Then we had to set the position behind the player which became problematic because we didn’t understand how but I finally figured out a simple solution.

First I tried to use vector math to set the position from the boss to the player and then further, but this became complicated real fast. So after brain storming about it for a while I came up with the idea to take the player position minus the cameras forward direction from a unity function. Now it would be at the player and all we had to adjust was how far behind the player it needed to be using multiplication on a constant variable.

Now we updated the camera’s rotation with unitys LookAt function and the camera’s position with help of the the players position and cameras facing direction. Then we activated it on and off with a button press and a bool check.

Bool check is a on or off check.

BGP #2

Welcome back to Causality!

Today I will talk about what I accompliced this week by focusing on my work with the camera in our game and how it affects the use of movement in our game. We began by using a unity’s transform function called LookAt which changes the rotation of the camera to face an object, the object was the player then rotate the camera around the player by changing it position with the controller in a sphere.

So now instead of moving around using the world position we needed to change the movement depending on the camera’s position all to prevent the player from getting disoriented and making the controls easy to understand.

To have the character move according with the camera I began by getting the input from the controller using conde and unitys input manager then making a function that returns a normalized vector . The functions return a vector with the direction to rotate the player towards then I had to changed the vector by the camera’s rotation so i could get the rotation for the players facing and then I had to move the player in that direction using unitys forward functions that moves the player in the Z angle (0,0,1).

The forward function gives a normalized vector of the currents objects facing rotation then I used unitys rigidbody component to move position function. Normalize keeps the value between 0 and 1. The reason I used the rigidbody move function is to let the player use unitys physics engine.

BGP #1

Welcome to Causality!

My name is Christoffer Lövdahl and I’m a design Programmer for the team Yggdrasil working on the design concept Causality in Unity.

Causality is an Action RPG viewed from a third person’s perspective that is focused on adventuring and fighting inside a dungeon environment.

The player controls his character and is able to use a few basic attacks and also additional abilities and will face challenging monsters where you have to read and understand them to win. Causality take place in a fantasy world with design references from the 16th to 19th century england.

My first assignment week 1 was to have our player character move. So I began by following a simple tutorial that used unity’s component character controller.

Unity’s character controller move function transforms the character position in a direction without using forces such as velocity while it isn’t affecting other unity components such as rigidbody and still being constrained by collision boxes.

Now a problem occurred when we added a rigidbody to the character because he needed physics to be pushed away by the enemies which caused the rigidbody and character controller to make the character start to vibrate in place so we decided to remove the character controller and code a new movement script.

This time we decided to use rigidbodies AddForce function to move the character. The addforce function uses applied force in a direction set by a force vector. We had to set the force vectors y direction to zero so it wouldn’t start walking in the air. However When we designed our map we used a ramp where you had to move upwards this caused the character to get stuck with add force and this is why we changed from Addforce to transform position.

But soon we realized that transform position ignores all physics generated which was why we were instructed to just rigidbodies moveposition which works in the same way but also counts in the physics such as collision boxes.

Shockwave PowerUP LAST CALL!

Dear, reader.

This week I have had a lot of bug fixing to do but i also had to work on a few items we weren’t able to make in time for our beta testing. So today i will write about our shock wave power up that I been working on this week.

Foremost we wanted a Time bomb as a power up that you threw out of the ship that would explode after a couple of seconds. But the closer we came to the beta testing we decided as a group to scrap the time bomb and create something easier. We ended up our discussion by choosing to make a power up similar to that of the electromagnetic pulse like power up but since our enemies isn’t electrical and is organisms made out of alien anatomy that isn’t affected by an electromagnetic pulse. So we choose to implement a shock wave made out of high compressed air and sound to kill everything on the screen because it would be much easier to create by simply scaling it and setting the position on the player.

This was easy to execute by simply making a shock wave class where we loaded a texture animation to our sprites and then to make it expand, I began by increasing the scale of the sprite by using the SFML sprite own function by typing scale and writing withing parentheses how much the sprite will grow ex. 1.04 is increasing by 4 percent, I called this function with each update of the shock wave class. Now I needed to continue with the collision of the shock wave power up.

Our collision structure uses the float rectangle function from the SFML library to create a hit box. But as the shock wave expanded the hit box didn’t change position and just expanded to the right and down so I had to change it. I knew my friend had done a similar power up when he did his electromagnetic pulse. But as I mentioned earlier I wouldn’t be able to use an electromagnetic pulse. So I came to the conclusion that I would just remove the enemies when I removed the electromagnetic pulse. First I tried to remove the electromagnetic pulse when the pulses hit box collided with the windows edges but as the hit boxes position didn’t work properly. I added a timer that would start when I fired the pulse and then remove both the electromagnetic pulse and enemies when the timer hit 1 second.ShockwaveAnimation

Light Beam

Hello and welcome!

images

This week i have worked on a lot of bug and small artifacts like like fixing lights or implementing menu screens, end screens and screen shake so instead i will write about the light beam I created.

I began by making a class and since we don’t have a sprite manager I set the texture and sprite inside our constructor as well as the position and origin. Now I made an update function to change color at random and update the hit box.

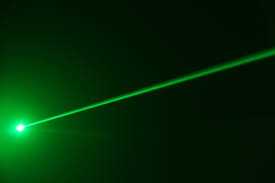
My group wanted a light beam as a Power up that we should shoot because we wanted a powerful weapon to take down many enemies in a row.

This simple light beam we wanted as a laser, all light beams are faster than the eye can see and to do this i first started to expand it by increasing it’s size but as i realized this was just unnecessary since my laser would never be seen increasing. So I just set it long enough to reach outside of the screen since it never ended when it collided with enemies or walls because of how short there was to the beta.

But this ended with a problem since we are using rectangle collision and the SFML function float rectangle to create the hit box and by using its own intersect function to see if it collides with other objects using the float rectangle function. But now the real problem occurred where the hit box won’t rotate when I shoot the laser in a y axis which expanded the hit box to cover everything on the y axis.

So to fix my problem with the laser hit box I had help from a friend named Malcolm who told me to try using a ray march which is a method. Using this method where you will spawn one sprite and if it does not collide it creates one more. To do this I used a while loop to create new light beam sprite until It would collide with our screens edges then stop spawning and then I choose to just remove it next update so it wouldn’t be everywhere on the screen. This did not solve my problem with the to big hit boxes completely but It improved it since now the light beam hit boxes was much smaller.

Another way to fix this would be to use separate axis theorem which I will not have enough time to learn about and implement until the final.

Owl Moms features

Dear, Group 13.

I can tell you are using Managers to handle events such as input manager, animation manager and sound manager and then use them all inside the owl mom class. Using managers is useful and increases efficiency by using the same code and over and over again.

You are creating the owl mom inside the enter function inside game state which is good since it need to be in the game from the start. The owl mom is connected with the owlets inside the game state and they are taking the owl moms movement so they follow the owl mom around as well as having their own movement behind the owl mom.

The owl mom class is also effected by other creatures where it using a collision manager to see if they collide and it has a stress meter which is used to increase the owl moms stress meter. The stress meter is like a life force to her and it increases when enemies are on the screen or when it collides with enemy creatures.

You are reading the owl moms position when you are creating the projectile but you are only able to create one projectile which is okay if that is how you wish to have your game play but can easily be fixed by adding a vector with the projectile as the object inside the header of your game state and then create new projectile when firing and use the vectors own function push_back to put them in the line and deleting them when they go outside the screen.

I see you are adding each frame for the animation from it’s x value inside your owl mom class when you should ask for a sprite sheet from your graphic designers or change it yourselves that starts let’s say at 0 then 200 then 400 and so on and use a for loop to read all the frames to keep the code more clean and readable.

I can tell you have reused the SDL code structure and code, not that it’s a bad thing but you should try to learn from the new library and try to use it’s functions like SFMLs own move function instead of setting a position.

As well with the making of the input manager was probably a waste of time since SFML have it’s very own.

This is only my opinion which is from an outsider that still think you done a great job.

.

Code optimization

Welcome dear readers!

This week I’m going to talk about optimization which is highly necessary but is usually overlooked by us unschooled programmers. I will optimize our code structure by removing unnecessary code strips, moving code for more efficient reading from our program as well as reading and understanding from the coder.

Our group have only inexperienced programmers so even though we have tried to make an efficient engine we ended up with several hiccups and since we had time pressure to finish certain things in time we decided to make everything in a simple and “working” manner. We also used classes to handle behaviors for our objects which was at most well programming we were capable off at the time so our code structure turned into a messy program which worked. But this turned into a big problem when we wanted to change states and add a menu state since we had coded everything in main. So I started by creating my window where I displayed my game using the render window function from the SFML library in main and added a while running loop for the game then I added implemented our state manager another member in my group had made. With the help of the state managers set state function I set the state to game state inside my main.

Now I moved all game code inside main to the game state where I had split them up like our sdl project using a constructor, deconstructor, Enter, Exit, Update, Draw, Set State and check collision. Everything before the while loop in main ended up inside the Enter or the variables inside the header. Everything that should be drawn I set inside the draw function and my collision check was moved inside check collision and then used inside update. All behaviors or changes occurring inside the game was set inside the update function and by returning false and setting the menu state as my next state got sent to the menu.

Now we will be able to read the code more efficiently and find errors easier by going to the specific function instead of scrolling through main. My biggest problem with setting different states was to send the window to my states which I had to use a pointer on the window and use it as a parameter inside the constructor and send it on when I set my state.

See you next week readers!Optimization